How to host a meeting in Cisco Webex through Pega
Step 1 : Go to https://developer.webex.com/ . login/signup to your webex account
Step 2 : Click on Start building apps.
Step 3 : Create a new app and select Integration.
Step 4 : Fill up the basic details as per your choice

Step 5 : In the redirect URI use: http://localhost:YOURPORTNUMBER/prweb/PRRestService/oauth2/v1/redirect
Scopes : Choose the "meeting:schedules_write "
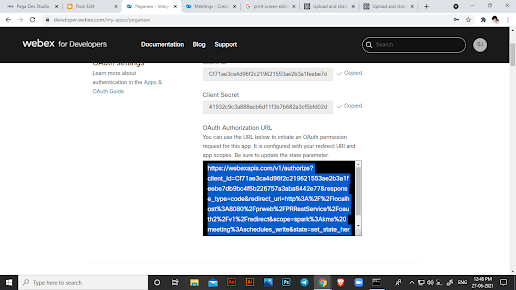
Step 6 : Click on "Add Integration". In the next screen you will be able to see your client ID and secret make a note of it.
Step 7 : Copy the link that is generated in a new tab , sign in to your cisco account
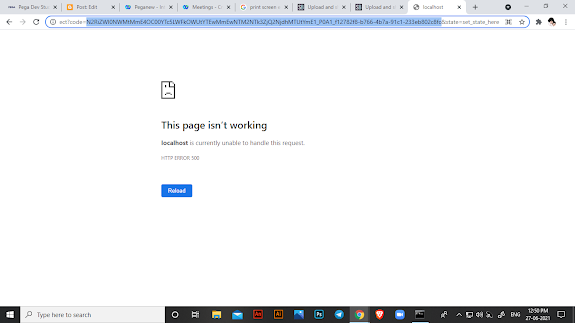
Step 8 : You will see below screen, from the url just correctly copy the code part alone and note it down you will need it in future.
###--------------------------END OF CISCO WEBEX CONFIG ------------------------------###
PEGA CONFIGURATION
Step 1 : Records -> Security -> Authentication profile -> Create new
Choose type : Oauth2.0
Step 2 : grant type : Authorization code
Client identifier : Client ID of your Cisco webex App
Client Secret : Client secret of your Cisco webex App
Scope : meeting:schedules_write
Auth Code endpoint : https://webexapis.com/v1/authorize
Token endpoint url : https://webexapis.com/v1/access_token
Click Save .

Step 3 : To the right of access token endpoint url click on "edit access token parameters" and mention as below use your client Id and secret and the Authorization code got from copy pasting the link the new tab and click ok.
Step 4 : Configure -> Integrations -> Connectors -> Create Rest Integration
Step 4 : Endpoint URL : https://webexapis.com/v1/meetings
Authentication : Add your authentication profile created just now.
Step 5 : Click Connect and sign in to your Cisco Webex Account.
Step 6 : To ensure successful connection, you will be able to see the "disconnect option".
Step 7 : Click on next and continue, Choose the POST method
Step 8 : Click on continue and , Copy paste the below JSON in a notepad and save it as .json file.
{
  "enabledAutoRecordMeeting": false,
  "allowAnyUserToBeCoHost": false,
  "enabledJoinBeforeHost": false,
  "enableConnectAudioBeforeHost": false,
  "excludePassword": false,
  "publicMeeting": false,
  "allowFirstUserToBeCoHost": false,
  "allowAuthenticatedDevices": false,
  "sendEmail": true,
  "title": "Pega meet",
  "agenda": "pega features",
  "password": "rules",
  "start": "2021-07-05T09:30:00-10:30",
  "end": "2021-07-05T10:30:00-11:30"
}
Step 9 : Add the .json file in the +Add file option with method "POST" and type : "Request". Click on submit and next.
Step 10 : Create a data layer as well .In your suitable class note the data class path and the name of the datapage in my case "D_WebexPost".
Step 11 : Wait for generation
Step 12 : Go to the specified data class path and choose your datapage
Step 13 : Go to your datapage created just now. Go to Load management and select "reload once per interaction"
Step 14 : Open your requestDT and delete the .defaultResponse_GET
Step 15 : In the datapage actions-> run
Step 16 : Meet link gets generated ! If there is some error , change the start and end date timing in the request DT as of now I have scheduled for july 5th 2021
Do share your thoughts :)


Comments
Post a Comment